

This section provides an overview of the DJUCED PRO Mapper page in the Settings. You’ll learn how to import controller configuration files and create or modify MIDI mappings.
Please note that DJUCED PRO can currently only handle Hercules compatible hardware and remap some basic functions. Future updates will enable DJUCED PRO to support other brands’ controllers and unlock more advanced mappable features.
This article speaks about versions 6.2.4 and above, and will evolve by the time.
MIDI Controller manager overview #
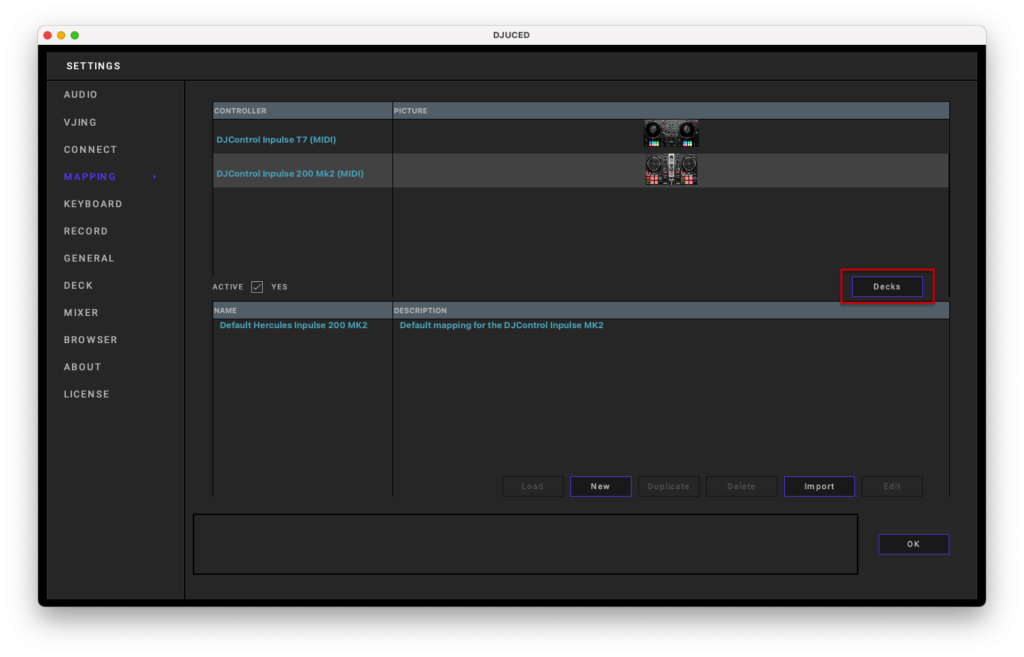
In this main window, MIDI controllers connected to your computer and recognised by DJUCED are listed.

Selecting a controller in the list in the top window allows you to :
- Activate or ignore the controller with the « Active » checkbox.
- Select a default mapping integrated inside DJUCED ( when an official DJUCED integration has been made).
- Create a blank new mapping with the « New » button.
- Duplicate a selected mapping with the « Duplicate » button.
- Import a DJUCED .djm mapping file you downloaded.
- Edit a selected mapping.
- Choose a target deck control with the « Decks » button.
DJUCED Mapping File (.djm) #
A DJUCED Mapping file is a file auto-generated by DJUCED when you create a new mapping.
The extension of this file is .djm
All created or imported .djm mapping files are located inside the « Documents/DJUCED/Midi » folder.
By default, double-clicking on a .djm file from your Explorer opens DJUCED and imports the mapping file automatically.
Managing destination decks #
It is not necessary to remap an entire controller to change the destination decks controlled.
As most of the integrated mapping is controlling Decks 1 and 2, it is possible to use the Decks button to assign an entire deck.
There are two 2 Decks controllers in the next example : an Inpulse T7 and an Inpulse 200 MK2.
The goal is to assign the Inpulse 200 MK2 to DJUCED decks 3 & 4.
Select the Inpulse 200MK2 controller, then click the ‘Decks’ button.
This pop-up windows appears and shows that the selected mapping is controlling DJUCED 1 and DJUCED 2 decks.
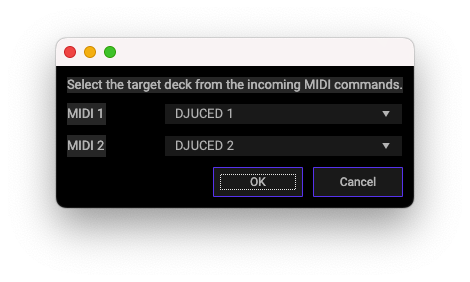
Select the destination decks you want to use.
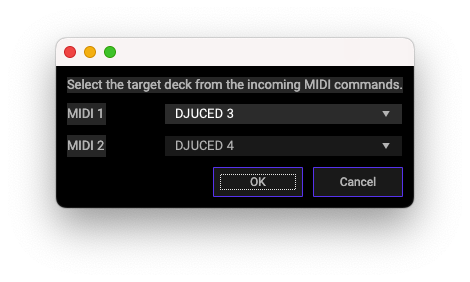
In this case, Decks 3 & 4 replace Decks 1 & 2.
Clicking OK applies the changes and exits the pop-up.
Using the MIDI Mapper #
DJUCED PRO contains a MIDI mapper window.
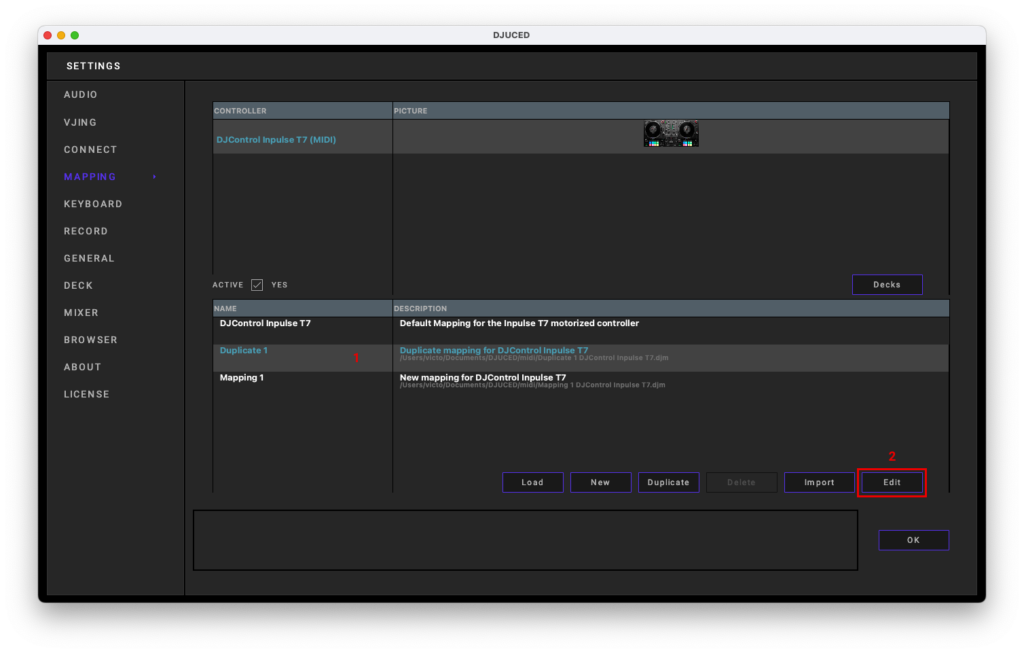
The MIDI Mapper lets you modify an existing mapping file or create a mapping from scratch.
To open the MIDI Mapper window, select a new, a duplicated, or an edited mapping file in the list (1), then click the EDIT button. (2)
Note : Default mappings can’t be edited.
Then, the MIDI Mapper window appears.
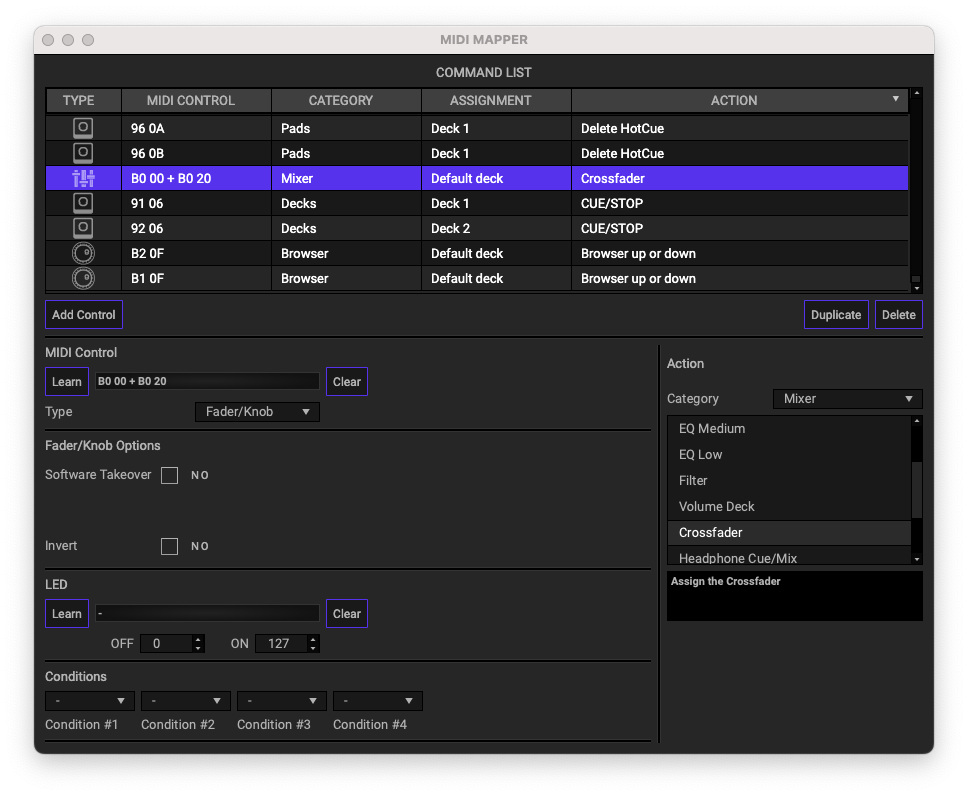
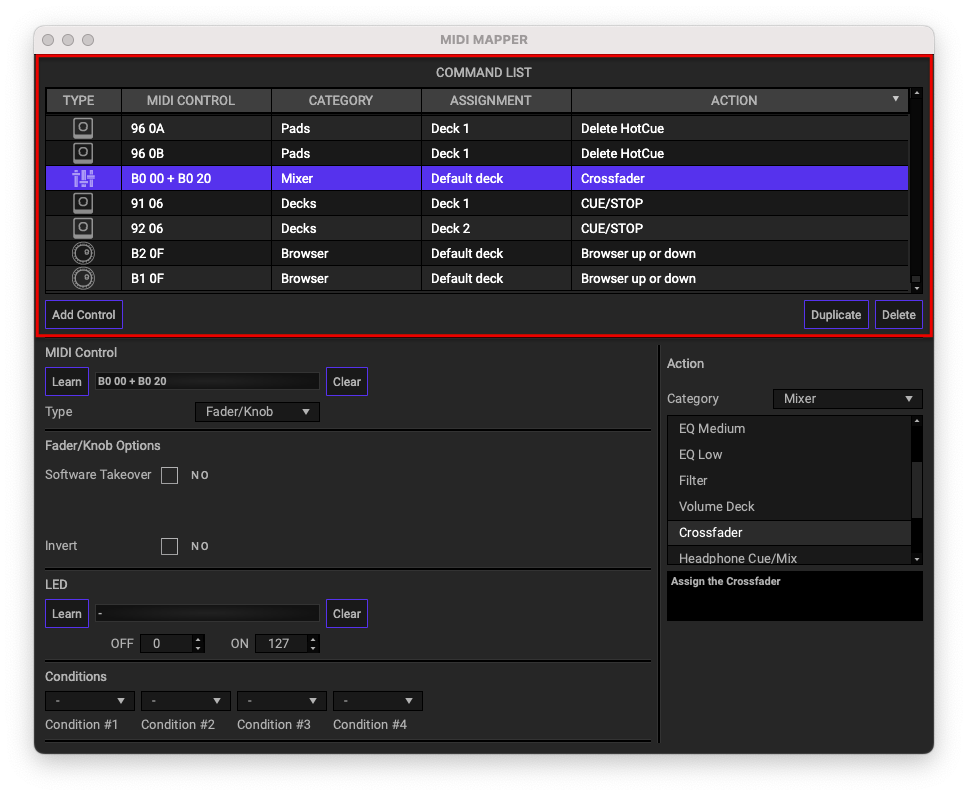
The MIDI Mapper window has three areas : #
The Command list part is the list where you’ll be able to add, remove, duplicate, or find a control already mapped to an action.
It is possible to sort this list by the type of controls, MIDI message noted in hex, action category, deck assignment, and action name.
Tip : touching a control on your controller will find it on the list.
It is an easy way to modify some controls.
click to zoom
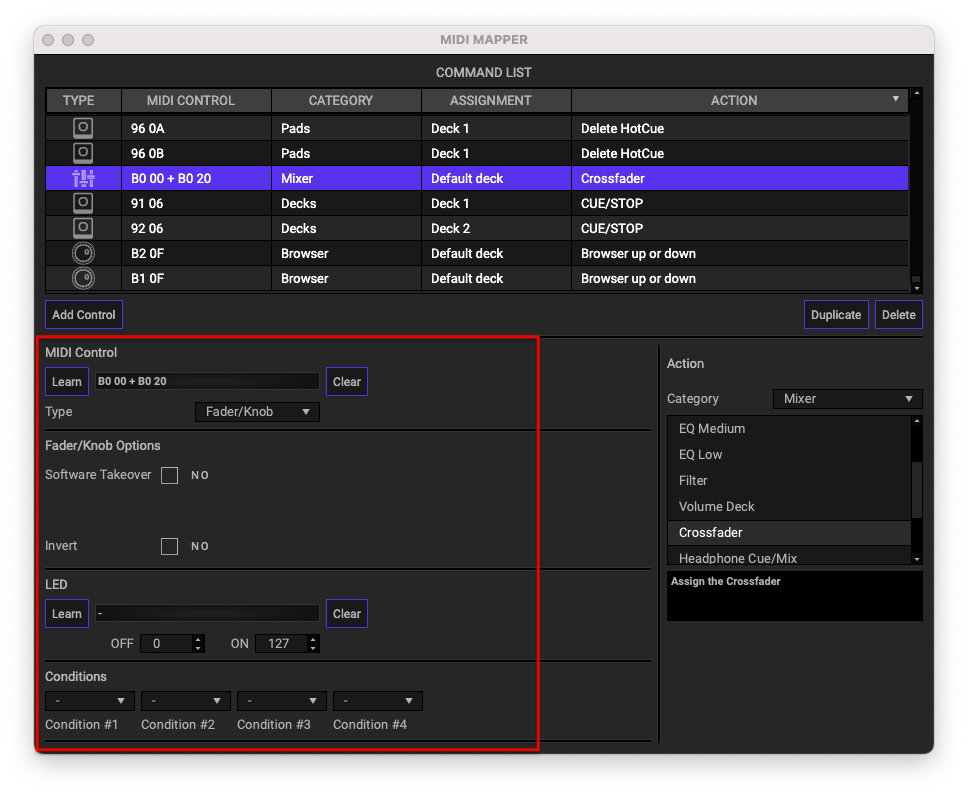
The MIDI Control area allows you to Learn a control type in INPUT (Fader/Knob, button or encoder), or OUTPUT (LED).
Each type on control got their own Options.
click to zoom
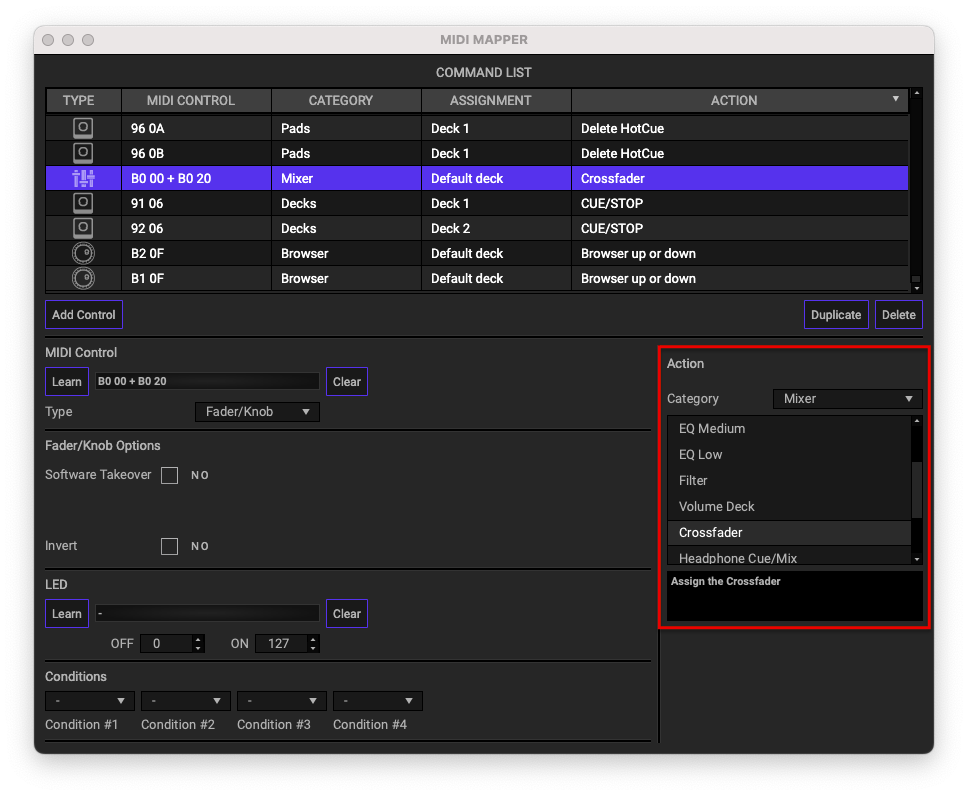
The Actions area allows you to assign an action to a MIDI Control. Actions are organised into categories and automatically filtered based on the selected MIDI Control type.
When selecting an action, a description is displayed in the box.
Additionally, some actions offer advanced options.
Please note that editing an action is immediately applied, allowing you to test your mapping in real time.
However, some commands, particularly those involving LED output, may require a software restart for correct application.
click to zoom
You now have all the basics to modify and create your mappings!